Widget Locations
The Photoslurp plugin for WooCommerce allows you to display widgets in any of the following pages:
- Homepage
- Category pages
- Product pages
- Lookbook (landing) pages
- Any additional location where your theme allows you to place a WordPress short code (e.g. order confirmation page).
Based on customer feedback, we recommend always inserting at least a carousel widget in product pages. Since all of our packages include unlimited widgets, we encourage you to be creative and experiment with widget placement throughout your customer’s journey.
Adding Widgets in the Module
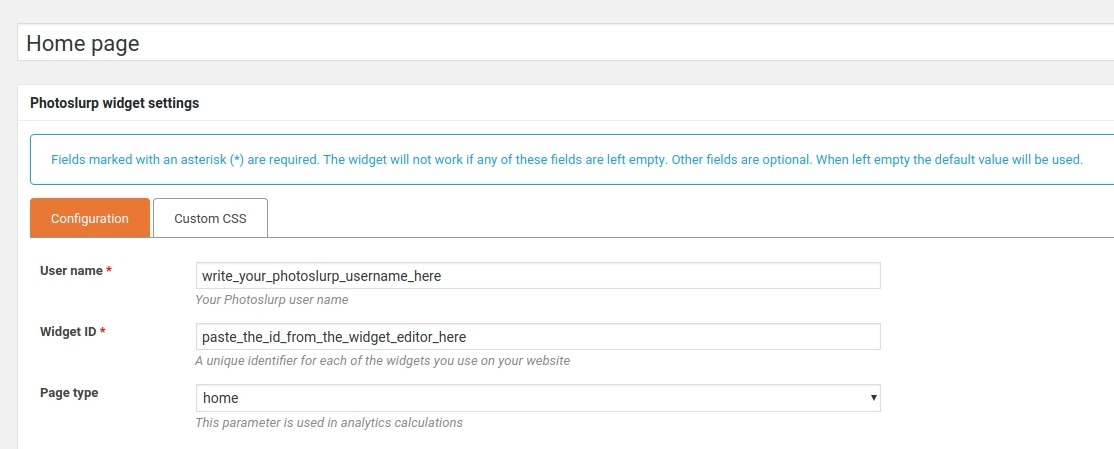
Once you have configured a widget in the Widget Editor, copy the widget ID by clicking on the copy icon next to it. Back in your WooCommerce dashboard, click on the “Photoslurp” button in the sidebar menu and then click on “Add Photoslurp widget” at the top of the page to configure a new widget in your store.
The “Add new Photoslurp widget” page will open, where you have to enter your Photoslurp username and paste the widget ID that you copied in the Widget Editor. Should you want to customize the appearance of the widget, you can add custom CSS in the “Custom CSS” tab.
The “Page type” dropdown menu lets you choose between four locations to insert your widget.
A. Homepage Widget
B. Product Widget

Product widgets are meant to be placed in your PDP. By default, these widgets include a productId parameter whose value is the identifier of the product in the page. This allows for the widget to first display all the content that has been assigned to the product in the page, and then the rest of unrelated content. To set it up, set the "Page type" to "Product" and then configure the following options:
Show on product pages: Enables the widget to be displayed in your store's product pages. This option will automatically place the widget on all your Product pages.
Product page position: Allows you to set up the widget's placement within the PDP.
Only show media from product category: Using the "productType" parameter, this will ensure that the widget displays first all the content assigned to the product, and then all content that shares the same Product Type as the product in the PDP.
C. Lookbook Widget

Lookbook widgets are meant to be placed in Instashop/Gallery pages. It is possible to make them only show content from specific categories by using the "Only show media from product categories" option. In order to implement them, please follow one of the methods explained below.
D. Category Widget

Category widgets are meant to be placed on Category pages. To set it up, set the "Page type" to "Category" and then configure the following options:
Show on category pages: Enables the widget to be displayed in your store's category pages. This option will automatically place the widget on all your Category pages.
Category page position: Allows you to set up the widget's placement within the Category page.
Only show media from product category: Using the "productType" parameter, this will ensure that the widget displays all the content that matches the product type for the Category page they're being placed in.
Inserting the Widgets on your site

- As a short code: On Photoslurp's menu, select the widget that you want to insert and copy the short code from the sidebar. Then, go to the Pages menu, select the page in which you want to insert the widget and click on Edit. Switch to the HTML view of the code by clicking on the "HTML" tab, and paste the short code that you copied earlier in your desired location.
- As a WordPress widget: Go to Appearance -> Widgets. On widget list on the left, select "Photoslurp Widgets" and add it to your desired sidebar. Then, select which widget you want to insert in the dropdown list.
- Product/Category pages: Widgets that have had its “Page type” set as "Product" or "Category" will automatically appear on their corresponding pages as long as the option "Show on product/category pages" has been activated. For category pages, you can even select which ones will display the widget and which ones won't.