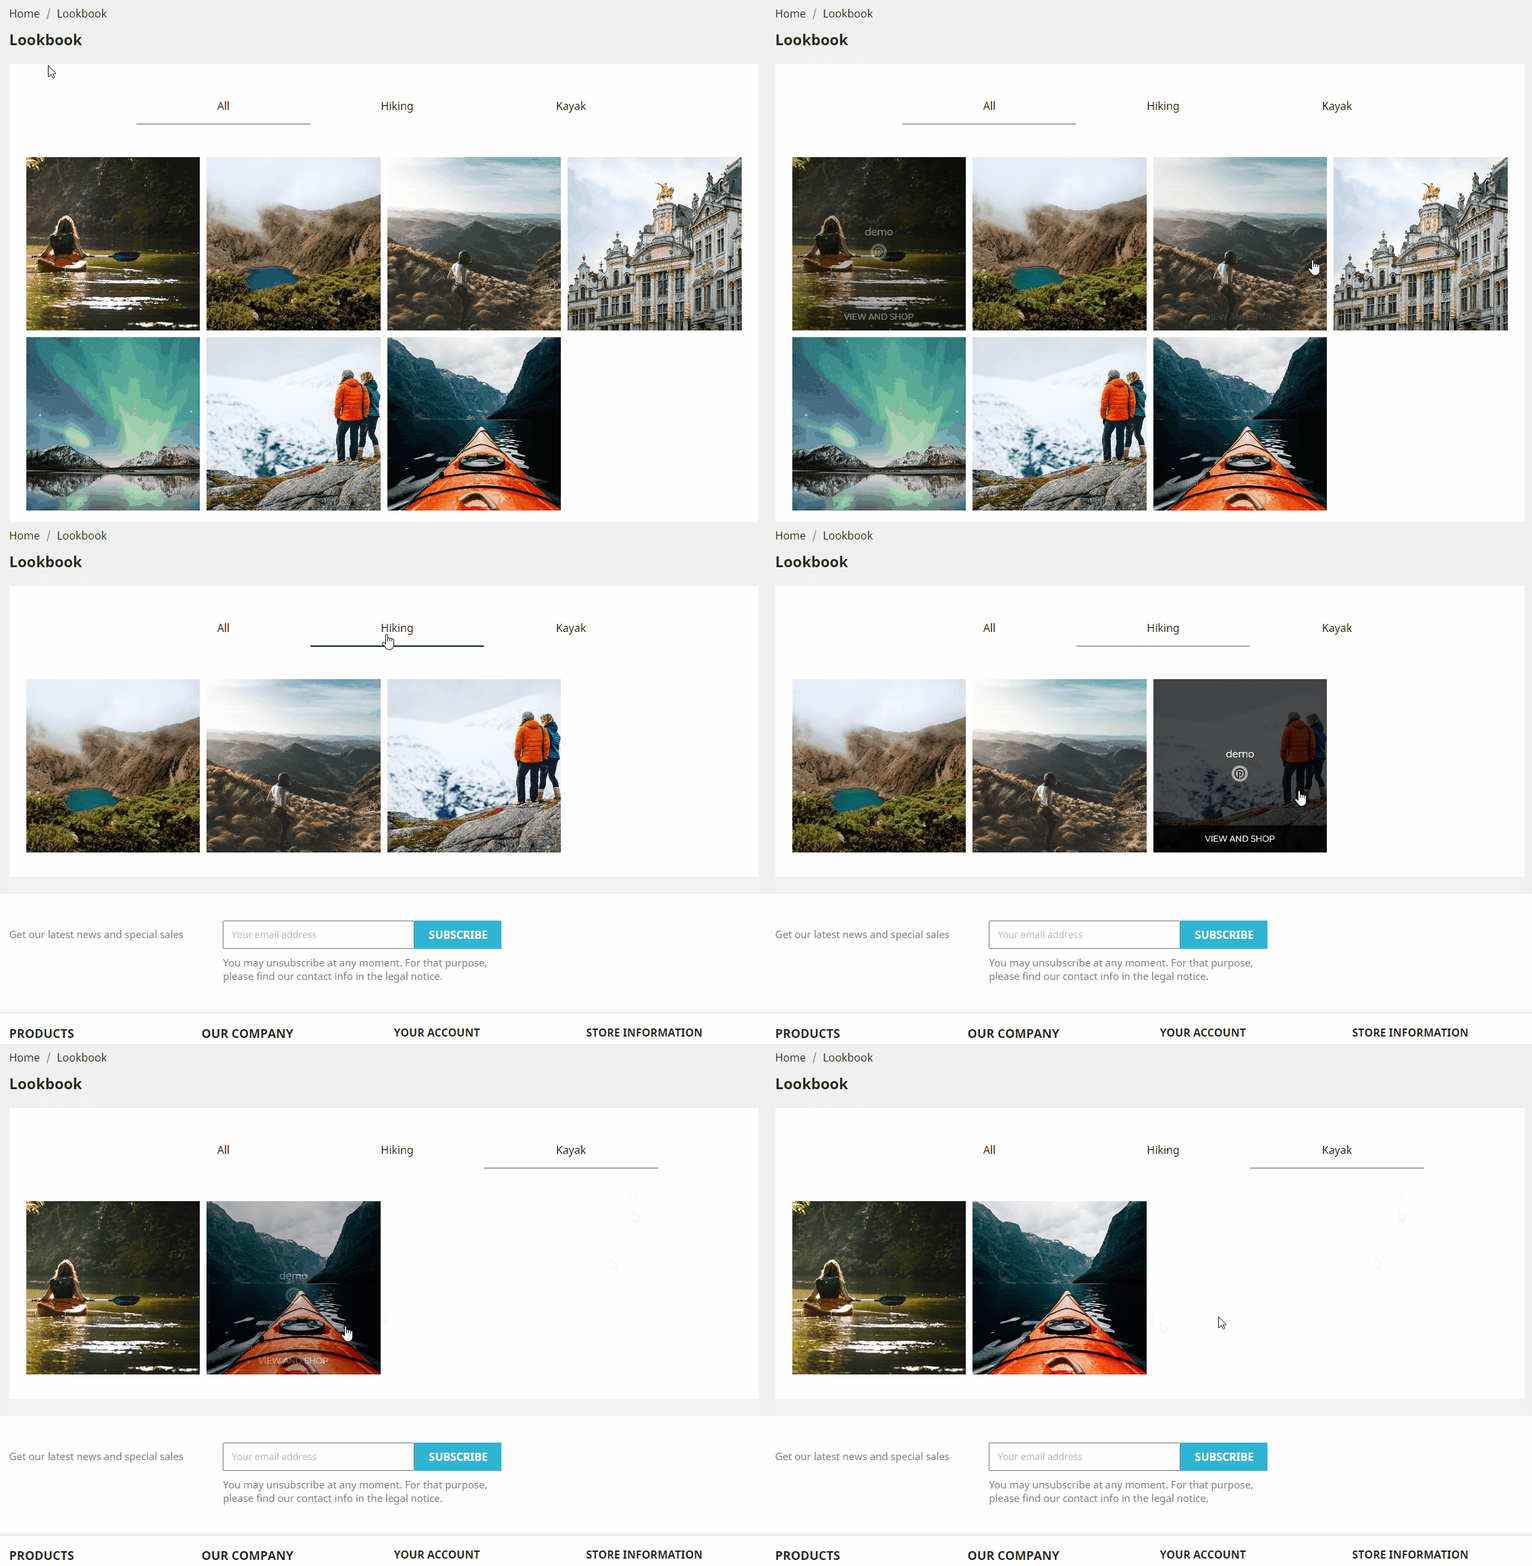
To create a Lookbook page you need to create a new CMS page and then insert a Lookbook widget in it. You can also insert multiple lookbook widgets to make it a multi-gallery lookbook, where the user selects from a menu what category they want to see, making the corresponding widget load.

To create a multi-gallery lookbook, you first need to create a widget, in the Widget Editor, for every category you want to include in the lookbook. Then, you will add all these widgets to the Photoslurp module in your Prestashop as "Lookbook" widgets.
During the widget creation process in the Prestashop module, assign the desired category for each widget by activating the "Only show media from product category" option and then selecting the category from the list.
Once the widgets have been correctly set up in the module, the next step is to integrate them into the Lookbook CMS page. For example, let's say we want to add 2 widgets that include 2 different types of products. You will need to insert both widgets in the CMS page, and also add code to make them appear or disappear when the user clicks on one category or the other.
Prestashop 1.6
In Prestashop 1.6, paste the following code into CMS template file located at *themes/name_of_your_site_theme/cms.tpl*:
{if $cms->id eq 6}
   <menu class="tab-menu">
     <li class="tab-item tab-item_active">CATEGORY 1</li>
     <li class="tab-item">CATEGORY 2</li>
   </menu>
   <ul class="widgets-list">
     <li class="widget-item">
       {hook h='psWidget' id_pswidget='5'}
     </li>
     <li class="widget-item widget-item_hidden">
       {hook h='psWidget' id_pswidget='6'}
     </li>
   </ul>

{literal}
      <style>
          /* MENU SELECTOR STYLES */
          .tab-menu {
            display: flex;
            align-items: center;
            justify-content: center;
            list-style: none;
            margin-bottom: 3rem;
          }

          .tab-item {
            flex-basis: 25%;
            background: transparent;
            border-bottom: 1.5px solid transparent;
            color: #000;
            cursor: pointer;
            text-align: center;
            padding: 1em 0;
          }

          .tab-item:hover {
            border-bottom-color: #05301a;
          }

          .tab-item_active {
            border-bottom-color: #aaa;
          }

          .widgets-list {
            list-style: none;
          }

          .widget-item_hidden {
            display: none;
          }

          .widget-item .ps-container {
            min-height: 1px;
          }
      </style>

      <script>
        /*	SCRIPT THAT HANDLES MULTI-GALLERY FUNCTIONALITY		*/
        (function() {
          var arrProto = Array.prototype;
          var forEach = arrProto.forEach;
          var indexOf = arrProto.indexOf;
          var widgetItems = document.querySelectorAll('.widget-item');
          forEach.call(document.querySelectorAll('.tab-item'), function(tabItem) {
            tabItem.addEventListener('click', function() {
              document.querySelector('.tab-item_active').classList.remove('tab-item_active');
              this.classList.add('tab-item_active');
              var index = indexOf.call(this.parentNode.children, this);
              forEach.call(widgetItems, function(el, i) {
                el.classList[i === index ? 'remove' : 'add']('widget-item_hidden');
              });
            });
          });
        })();
      </script>
      {/literal}
{/if}
Prestashop 1.7
in Prestashop 1.7, paste the following code into CMS template file located at *themes/name_of_your_site_theme/templates/cms/page.tpl*:
{if $cms.id eq 6}
   <menu class="tab-menu">
     <li class="tab-item tab-item_active">CATEGORY 1</li>
     <li class="tab-item">CATEGORY 2</li>
   </menu>
   <ul class="widgets-list">
     <li class="widget-item">
       {hook h='psWidget' id_pswidget='5'}
     </li>
     <li class="widget-item widget-item_hidden">
       {hook h='psWidget' id_pswidget='6'}
     </li>
   </ul>

{literal}
      <style>
          /* MENU SELECTOR STYLES */
          .tab-menu {
            display: flex;
            align-items: center;
            justify-content: center;
            list-style: none;
            margin-bottom: 3rem;
          }

          .tab-item {
            flex-basis: 25%;
            background: transparent;
            border-bottom: 1.5px solid transparent;
            color: #000;
            cursor: pointer;
            text-align: center;
            padding: 1em 0;
          }

          .tab-item:hover {
            border-bottom-color: #05301a;
          }

          .tab-item_active {
            border-bottom-color: #aaa;
          }

          .widgets-list {
            list-style: none;
          }

          .widget-item_hidden {
            display: none;
          }

          .widget-item .ps-container {
            min-height: 1px;
          }
      </style>

      <script>
        /*	SCRIPT THAT HANDLES MULTI-GALLERY FUNCTIONALITY		*/
        (function() {
          var arrProto = Array.prototype;
          var forEach = arrProto.forEach;
          var indexOf = arrProto.indexOf;
          var widgetItems = document.querySelectorAll('.widget-item');
          forEach.call(document.querySelectorAll('.tab-item'), function(tabItem) {
            tabItem.addEventListener('click', function() {
              document.querySelector('.tab-item_active').classList.remove('tab-item_active');
              this.classList.add('tab-item_active');
              var index = indexOf.call(this.parentNode.children, this);
              forEach.call(widgetItems, function(el, i) {
                el.classList[i === index ? 'remove' : 'add']('widget-item_hidden');
              });
            });
          });
        })();
      </script>
      {/literal}
{/if}
Note: The id_pswidget value must be equal to the widget's ID assigned by the Photoslurp module for Prestashop, not the one in the Widget Editor.
You can hook as many widgets as you need, just make sure that the class widget-item_hidden is assigned in all but the first list item, and that the class tab-item_active is only assigned in the first list item of the menu. This way, the only widget you'll see when loading the page will be the first one.
The CSS styles can be tweaked to your liking. Within the script, you can also add Additional Widget Parameters in order to further customize the content of the widgets.