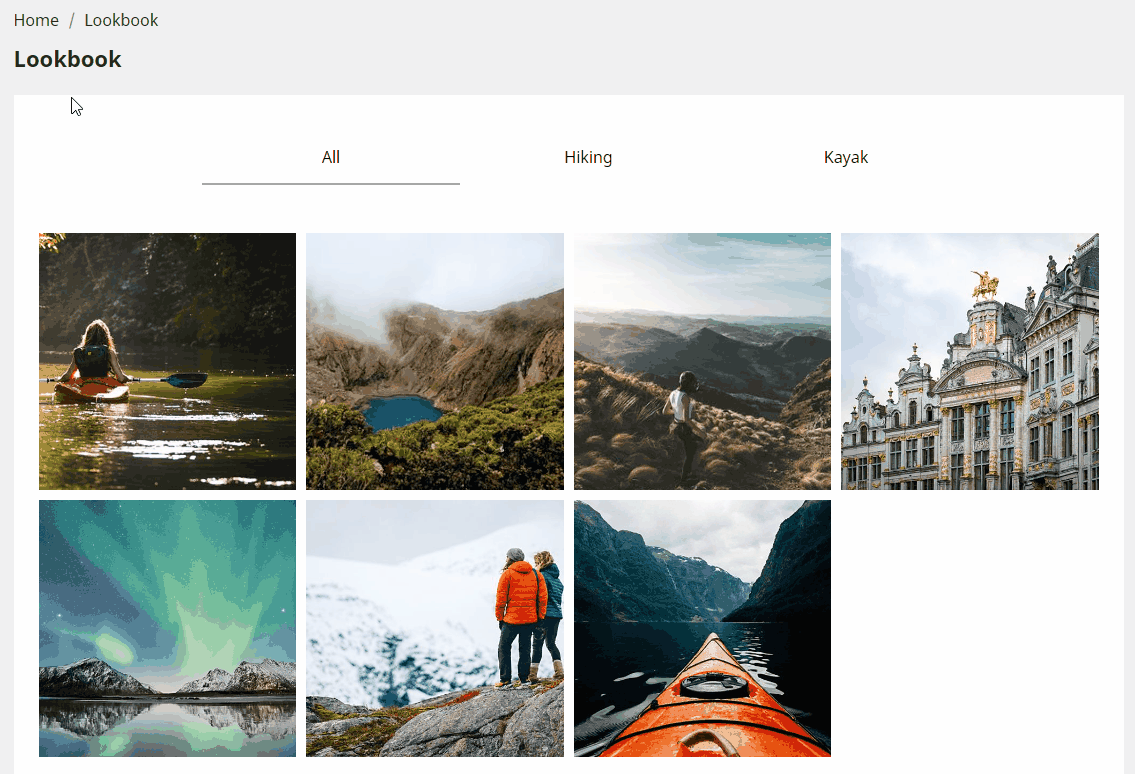
To create a Lookbook page, you will need to create a CMS page and then add a Lookbook widget to it. While this works well enough, it is also possible to add more widgets to this page so that it becomes a multi-gallery Lookbook. The user selects from a menu which category of content they want to view, and the corresponding widget loads, displaying the content belonging to the category the user has selected.
Click here for a live example
Creating the widgets in the Widget Editor
To create a multi-gallery lookbook, open the Widget Editor and create a widget for each category you want to include in the lookbook. Then you need to decide how to organise the categories that will appear in the multi-gallery tabs. There are two ways to do this:
-
Using Collections: If collections have been assigned to your content, you can add a different collection to each of the widgets you have created. You can do this using the Filter tab of the Widget Editor.
- Using Product Types: If you prefer to organise the tab categories based on the product_types value of the product feed, you will need to add the producType parameter in the code of each widget. This will be detailed in the next step.
Multiple-gallery code
Once the widgets have been set up in the Widget Editor, the next step is to add them to the Lookbook CMS page.
For example, let's say we want to use 2 widgets with 2 different types of products. You will need to use the Widget Embed Code to insert the widgets, the productType parameter of the Widget Configuration Code if using Product Types, and the code for them to swap as the user clicks between categories. Adding the following block of code to your page will achieve this.
Please make sure to edit the code in order to insert all required values, such as the widget ID and additional parameters.
<!--		MENU SELECTOR		-->
<menu class="tab-menu">
	<li class="tab-item tab-item_active">CATEGORY 1</li>
	<li class="tab-item">CATEGORY 2</li>
</menu>
<ul class="widgets-list">
	<li class="widget-item">
		<!-- Start Photoslurp embed code -->
		<div class="ps-container">
			<ps-widget data-config="INSERT WIDGET ID FOR WIDGET 1"></ps-widget>
		</div>
		<!-- End Photoslurp embed code -->
	</li>
	<li class="widget-item widget-item_hidden">
		<!-- Start Photoslurp embed code -->
		<div class="ps-container">
			<ps-widget data-config="INSERT WIDGET ID FOR WIDGET 2"></ps-widget>
		</div>
		<!-- End Photoslurp embed code -->
	</li>
</ul>

<script src="https://static.photoslurp.com/widget/v3/loader.js" async></script>

<style>
	/* MENU SELECTOR STYLES */

	.tab-menu {
		display: flex;
		align-items: center;
		justify-content: center;
		list-style: none;
		margin-bottom: 3rem;
	}

	.tab-item {
		flex-basis: 25%;
		background: transparent;
		border-bottom: 1.5px solid transparent;
		color: #000;
		cursor: pointer;
		text-align: center;
		padding: 1em 0;
	}

	.tab-item:hover {
		border-bottom-color: #05301a;
	}

	.tab-item_active {
		border-bottom-color: #aaa;
	}

	.widgets-list {
		list-style: none;
	}

	.widget-item_hidden {
		display: none;
	}

  .widget-item .ps-container {
		min-height: 1px;
	}
</style>

<script>
	window.photoSlurpWidgetSettings = window.photoSlurpWidgetSettings || {};

	/*	WIDGET CONFIGURATION CODE 1	*/
	photoSlurpWidgetSettings["INSERT THE WIDGET ID OF WIDGET 1"] = {
		lang: 'INSERT LANGUAGE CODE',
		productType: 'INSERT THE PRODUCTTYPE FOR WIDGET 1' //OPTIONAL: Not necessary if you're implementing by Collections
	};

	/*	WIDGET CONFIGURATION CODE 2	*/
	photoSlurpWidgetSettings["INSERT THE WIDGET ID OF WIDGET 2"] = {
		lang: 'INSERT LANGUAGE CODE',
		productType: 'INSERT THE PRODUCTTYPE FOR WIDGET 2' //OPTIONAL: Not necessary if you're implementing by Collections
	};

	/*	SCRIPT THAT HANDLES MULTI-GALLERY FUNCTIONALITY		*/
	(function() {
		var arrProto = Array.prototype;
		var forEach = arrProto.forEach;
		var indexOf = arrProto.indexOf;
		var widgetItems = document.querySelectorAll('.widget-item');
		forEach.call(document.querySelectorAll('.tab-item'), function(tabItem) {
			tabItem.addEventListener('click', function() {
				document.querySelector('.tab-item_active').classList.remove('tab-item_active');
				this.classList.add('tab-item_active');
				var index = indexOf.call(this.parentNode.children, this);
				forEach.call(widgetItems, function(el, i) {
					el.classList[i === index ? 'remove' : 'add']('widget-item_hidden');
				});
			});
		});
	})();
</script>
Note: You can insert as many widgets as you need, but it is important that the widget-item_hidden class is assigned to all <li> list items except the first one, and that the tab-item_active class is only assigned to the first <li> list item in the menu. This way, the only widget that will be seen when the page loads will be the first one.
CSS styles can be adjusted as needed. Within the script, Additional Widget Parameters can also be added to customise the content of the widgets.