IMPORTANT NOTE: In the case that you prefer to use existing Google Product Feeds from your store instead of our module built-in export feature, please inform our technical team and provide them with the product feed URLs alongside their language codes and store IDs.
1.Exporting the Store Product Feed
Once the Photoslurp module is installed, the next step is to export the Store Product Feed to integrate it with your Photoslurp account.
Click on the Photoslurp tab in the main admin menu (horizontal in Magento 1, vertical in Magento 2) and select Export
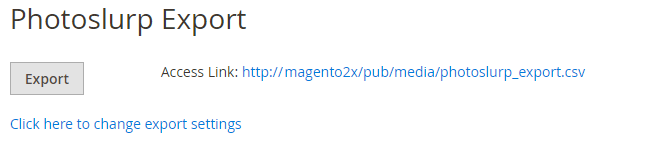
The "Export Products" button allows you to generate a link from which a CSV file, with the product feed in the format required by our platform, can be downloaded. With this link you can import it into a catalog in the Photoslurp dashboard.
2.Setting up an Automatic Product Feed Export
Go to:
System -> Configuration (Magento 1) or
Stores -> Configuration (Magento 2)
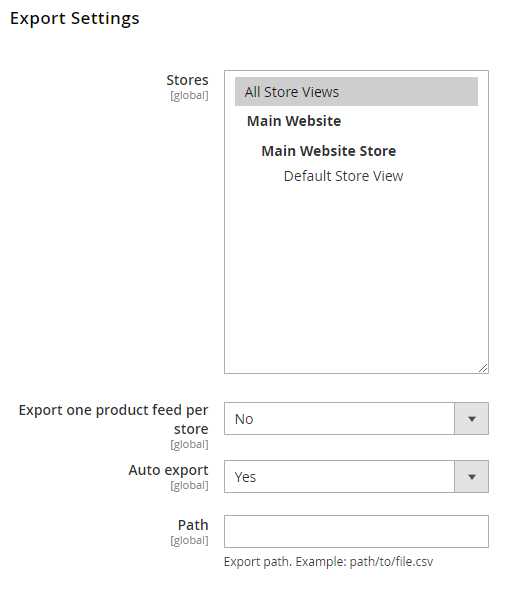
and you will find the "Photoslurp" option in the menu on the left. Click on it then click on "Export" and set the automatic export to "Auto export". This will create a 'Cron job' on your server which will ensure that the latest product catalog details are exported every 24 hours to the CSV file that was previously created with the Export Product Catalog function.
How to configure Multilingual sites?
Photslurp detects enabled languages and provides a language-specific field for each product attribute, allowing the widget to display product information in different languages.
We can manage all available languages in the stores from one single campaign:
- One catalog with all country data in it (descriptions/URLs/price in all the languages supported by the company).
- One campaign where all media is collected.
- All media accept/reject/linking can be done from one single campaign
- The same media is displayed on each country's website, but the product name, URL, etc are relevant to each country. This way, a user viewing the English website won’t be redirected to the Spanish product page when clicking on the ¨Shop this look¨ button.
- When the widget’s stock synchronization feature is used, content that has been linked to an out-of-stock product of a specific language or locale will not appear.
Frequently Asked Questions
How can I check that the cron job that exports the product feed daily is working correctly?
Once the Automatic Product Feed Export has been activated, wait at least 24 hours for the feed to be generated. Then, open the CSV file that has been generated and check the export date in the first row. If the date is the same as the current date, then the cron job is working correctly. In case it doesn’t, contact your tech team so that they can go through the next steps.
How can I troubleshoot the export cron job?
In case the export cron job is not working:
- First, make sure your cron jobs are up and running. Go to the main directory of your Magento installation and run the following code:
php bin/magento cron:run
Then, check the table cron_schedule of your Magento database by running the following query:
SELECT * FROM cron_schedule;
All the scheduled and executed cron jobs will be listed in the results.
You can also check the cron job log located in /your_magento_installation/var/log/cron.log - Check the content of the crontab file located in:
/your_magento_installation/app/code/Photoslurp/Pswidget/etc/crontab.xml
Check that the method called by the cron job is "photoslurpExport". Change the value assigned to "method" if it is not.
<job name="photoslurp_export" instance="Photoslurp\Pswidget\Model\Export" method="photoslurpExport">
 <schedule>* 2 * * *</schedule>
</job>
The “schedule” tags define how often the cron job runs. By default it’s set to “* 2 * * *”, which means the job will run every day at 2:00 am. For troubleshooting purposes change it to “*/5 * * *” for it to run every 5 minutes. - Flush the cache.
php bin/magento cache:flush
Run the cron jobs again
php bin/magento cron:run
- Check the cron_schedule table in your Magento database again running the following query:
SELECT * FROM cron_schedule WHERE job_code ="photoslurp_export";
The scheduled Photoslurp export jobs should appear here now, each one of them having a 5 minutes difference between each other in the column "scheduled_at".
- Finally, change the “schedule” tags in the crontab.xml file to the desired frequency. The 5 values represent minutes, hours, days, months and days of the week. For more information regarding the schedule, please refer to this page.
When you're done, save the changes and flush the cache again.